Dashboard: Connect
Connect is the discovery section for pointing a local AI client at this Routerly instance. It lists every client Routerly knows about and, for each one, shows the exact steps to connect it. It is read-only: there is nothing to save here.
The dashboard cannot write files on your workstation. To apply a client's
config file automatically, run the CLI on the machine where the client is
installed: routerly clients configure <id>. See CLI: routerly clients for the full command
reference (configure, undo, doctor, inspect, launch).
The client grid
Connect app sits at the bottom of the sidebar, right under Settings,
next to the other instance-level entries rather than in the working section
above. Or navigate to /dashboard/connect directly.
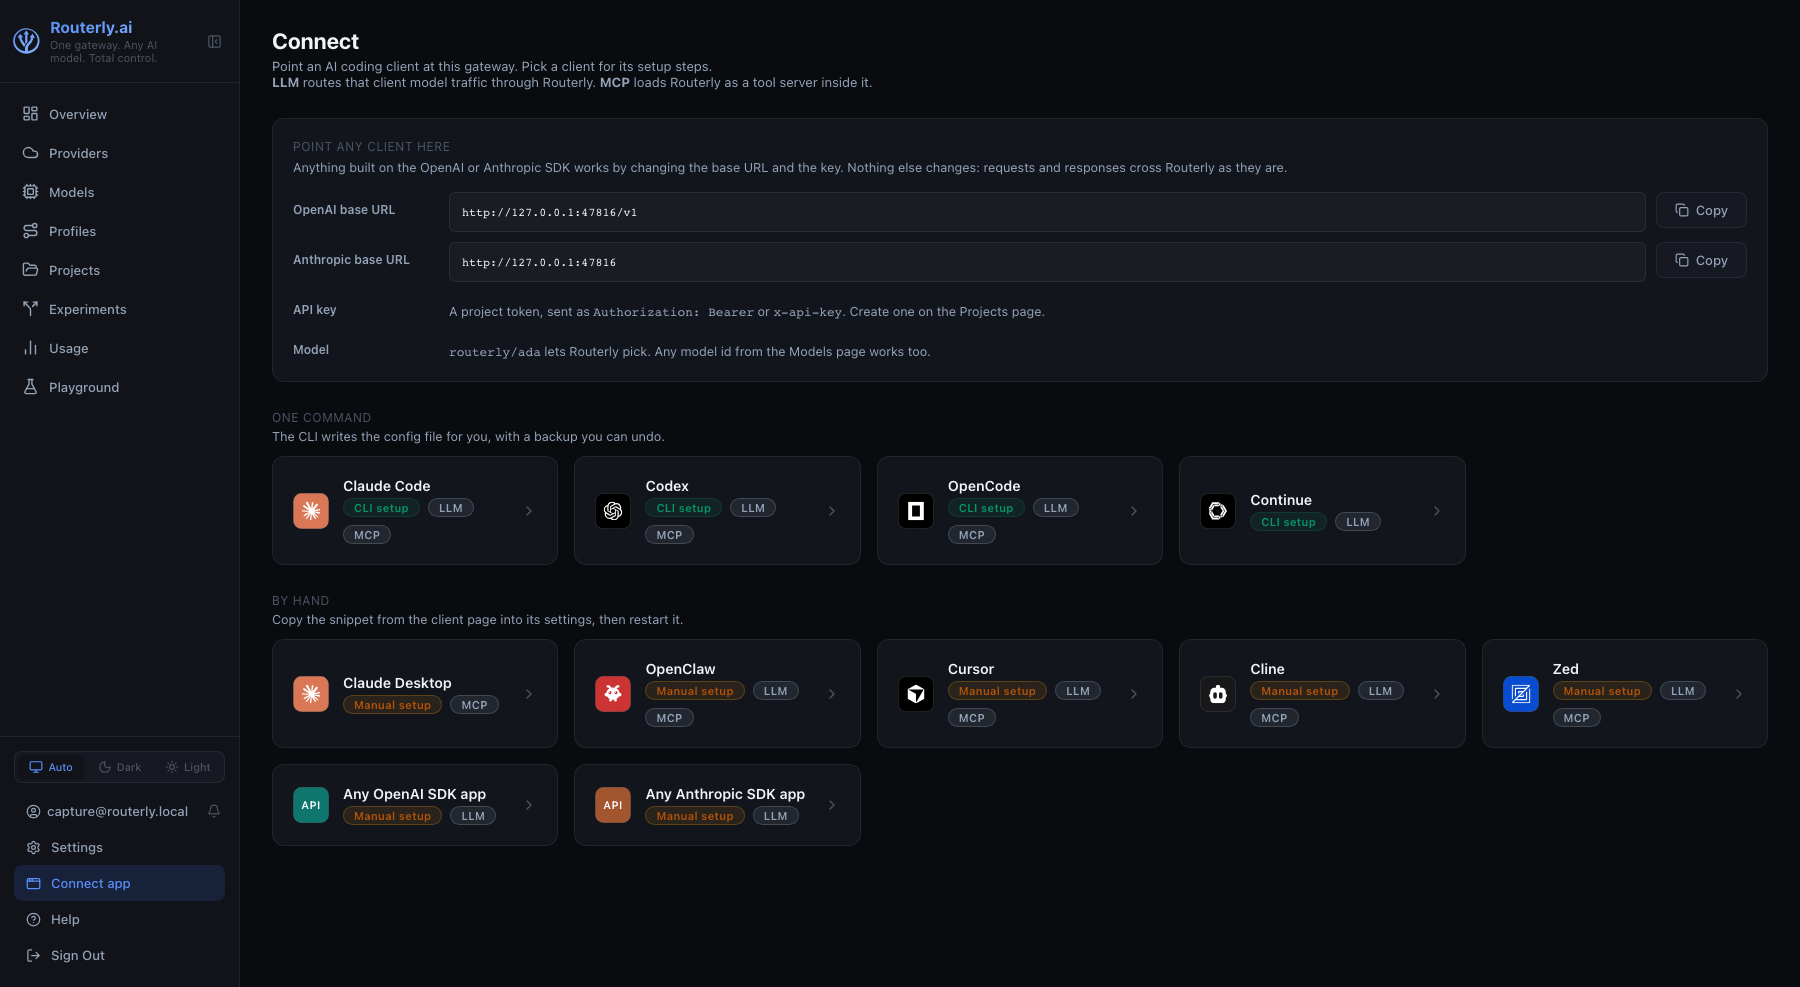
The Overview page carries a shortcut card to this section.
The page opens with Point any client here, the generic setup, valid for anything built on the OpenAI or Anthropic SDK whether or not it appears in the grid below:
| Row | Value |
|---|---|
| OpenAI base URL | <gateway>/v1, with a Copy button |
| Anthropic base URL | <gateway>, with a Copy button |
| API key | A router token, sent as Authorization: Bearer or x-api-key. Links to Routers to create one |
| Model | routerly/ada hands the choice to the router; any model id from Models works too |
Nothing else changes on the client side: requests and responses cross
Routerly as they are. The same four values are printed by routerly clients endpoints, which also lists
the addresses that reach this instance from other machines.
Clients are split into two groups:
| Group | Who lands there |
|---|---|
| One command | Clients the CLI can configure for you, with a backup you can undo |
| By hand | Clients whose settings you copy in yourself |
Each client is a tile with:
| Element | Description |
|---|---|
| Mark + label | The client's own brand mark and name. Only the two generic SDK entries, which stand for no single product, show a monogram instead |
| Support badge | CLI setup (green) when the CLI can write the config, Manual setup (amber) when the steps are by hand, Partial support (amber), Out of date (red) |
| Mode badges | LLM routes that client's model traffic through Routerly, MCP loads Routerly as a tool server inside it. Both are spelled out at the top of the page, and again on hover |
Selecting a tile opens that client's page.
A client page
/dashboard/connect/<id> shows everything needed for one client:
| Section | Shown when | Content |
|---|---|---|
| Header | always | Support badge, wire format (openai or anthropic), connect modes, and a link to the client's full documentation page |
| Fastest: one command | the client is auto-configurable | The routerly clients configure <id> command to copy and run on the machine where the client is installed |
| Or set it up by hand | the client has a config file or environment setup | The config path and the exact block to paste. Titled Set it up by hand (or Set up the config file) when there is no CLI alternative. Clients that route LLM traffic close with the model line: routerly/ada or any model id, and, for OpenAI-format clients, the note that the same three values fit any client offering an "OpenAI compatible" provider |
| MCP server | the client supports mcp | That client's own MCP configuration (mcpServers, context_servers, a TOML section, or a command) plus the command that mints an MCP token. Independent from the sections above |
| Check it worked | always | routerly clients doctor, and a link to Usage where the first call shows up |
Every code block has a Copy button.
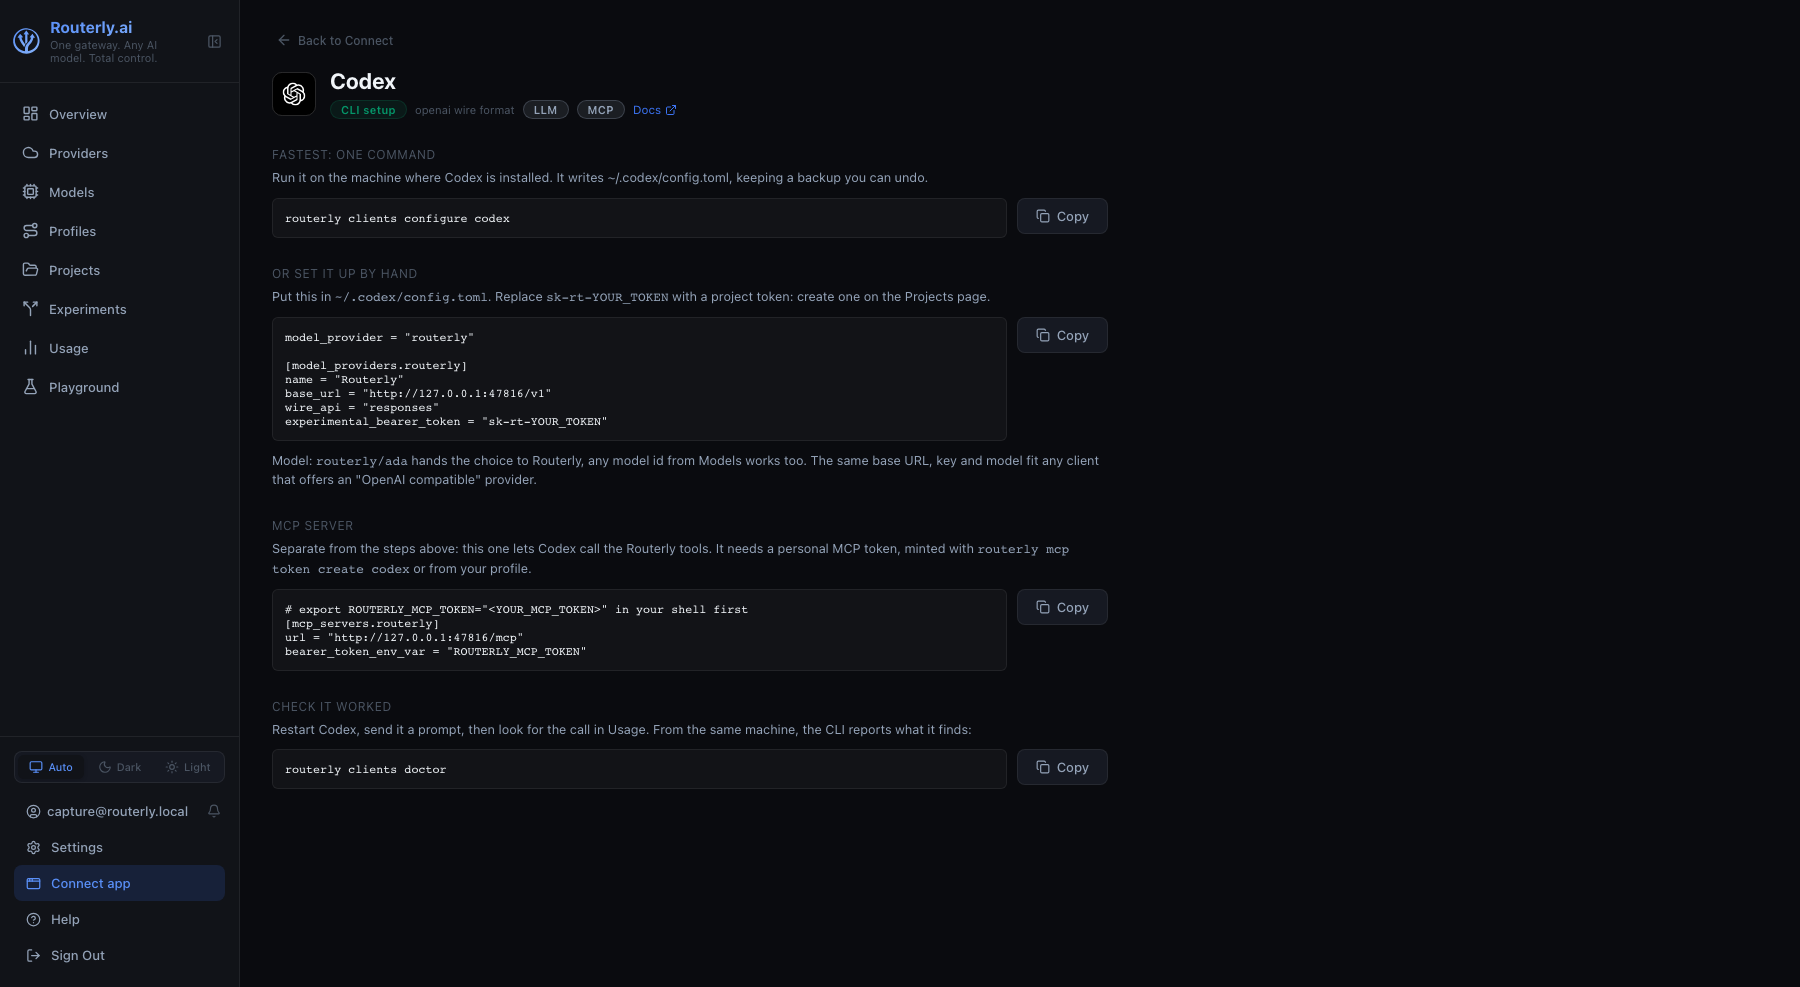
Tokens are placeholders here
Snippets in the dashboard carry sk-rt-YOUR_TOKEN (and <YOUR_MCP_TOKEN>
for MCP), never a real credential: the dashboard has no raw router token to
embed. Replace the placeholder before saving the file.
- Router tokens, for LLM traffic, are created on the Routers page.
- MCP tokens are personal: create them under Profile → MCP or with
routerly mcp token create --label <name>.
The CLI does this for you: routerly clients configure <id> --router my-api
mints a token when you do not pass --token, and writes the file with the
real value.
Applying a snippet by hand
- Open the client page and copy the snippet.
- Paste it into the client's config file, at the path shown.
- Replace the placeholder token with a real one.
- Save. Most clients pick the change up on the next request; some need a restart.
Then check the connection from the same machine:
routerly clients doctor
See CLI: routerly clients for the
command reference, and Integrations: Connect a
client for one manual guide
per client.